Impact of light leaks in Newton telescopes

15 replies970 views
Christian Großmann avatar
Hi,

I'm still working on some issues with my telescopes to hopefully improve the quality of some of my data. The beautiful nebulas are getting lower in the sky and the galaxy season is coming closer. So I want to adress some issues with my longer focal length telesopes.

I was wondering, why my data taken with the Newton scopes (especially the TS-Optics Photoline 8" f/4 and TS-Optics Photoline 10" f/5) of some galaxies have a really heavy gradient in the background. I never felt I have this issues with both of my refractor scopes. Usually, I image different targets with both types of scopes and maybe, a gradient in an image of a nebula isn't as obvious as a galaxy image with a dark background. But I assume, the Newton images are worse.

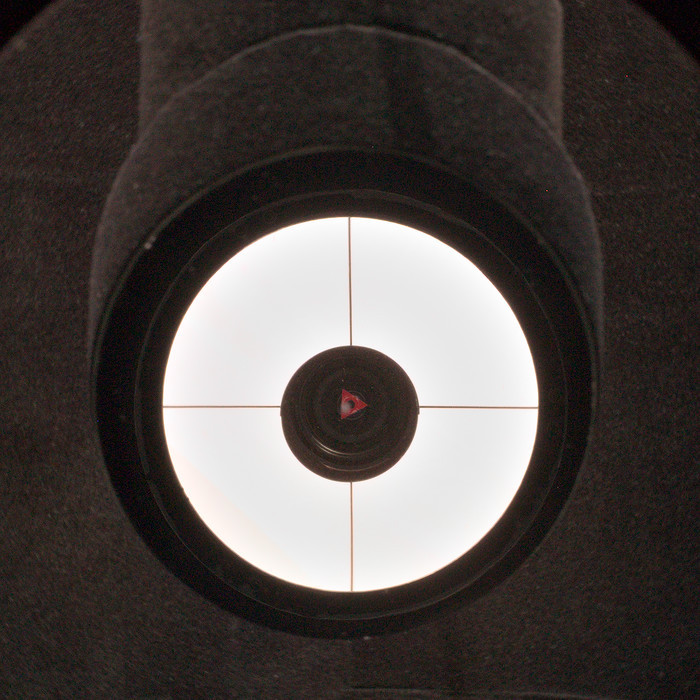
So I took a look at my Newton scopes and realized quite a big gap where the tube of the focuser slides into the housing that is mounted on the scope barrel. There is also a gap around the main mirror to ensure an air flow, I guess. The question is if these gaps could cause such a heavy gradient. What are your experiences? Could there be other things that effect such problems?

I know, both of the Newts are kind of cheapish and may not be made of the best quality parts. The focusers are really basic and have some other issues as well. But I assume, the more expensive ones are made with a similar concept in mind and just use some better parts somewhere. I'm thinking about buying a better focuser to adress some issues I have with heavy cameras and filter wheels. But before I invest in a better focuser, I want to check if it is worth it. Maybe it's better to invest in a new OTA that is made from higher quality parts. Basically I really like the images I get from the Newts, but while trying to improve, I have to solve some problems.

But fixing problems caused by light leaks are maybe a helpful experience anyway. But how much impact do they have on the subs?

It would be really nice, if you take the time to write some lines about your experiences.

Thank you and CS

Christian
Engaging
Tommy Blomqvist avatar
My only photo-Newt is a skywatcher 150pds and I've noticed that light leaks impacts a lot on the images. 
In my case the leaks came from the cell holding the primary and the focuser (both mount and tube).
The primary did I solve with tape (the kind that sticks with statics) and a cooling fan with light blocking filter.
I've also tries with tape around the focuser mount but that was a bit trickier.

Flocking the tube helps both light leaks and reflections from bright objects in the sky.

Another thing is to stop light from reaching the tube (in my case a "tent") or going to a real dark site 😀
Helpful
Sergey Kholmanskikh avatar
I've read a similar post recently on Cloudynights, where the topic starter identified that stray light was leaking directly into the coma corrector missing the mirrors. That happened because his focuser was close to the edge of the tube (as far as I remember this is also the case for TS-Photons) and his coma corrector was protruding far into the focuser. The remedy for this might be a light/dew shield.
Well Written Concise
Oskari Nikkinen avatar
You should flock the inside of your tube with matte black velour, such as this: https://www.teleskop-express.de/shop/product_info.php/info/p2336_Velours-Film-matt-black-100x45-cm---self-adhesive--for-blackening-the-tube.html
Or whatever your most convenient local astronomy supplier sells. These velour rolls are also sold in various hardware/diy shops so maybe no need to order if you can find some stocked near you.

The most important part is directly opposite to the focuser just behind the secondary mirror. This is where light gets reflected off the tube into your coma corrector/imaging train and will cause a gradient of some sort that can be tricky to get rid of. Behind and a little bit in front of the primary mirror is also an area of concern, so you'll want to flock that too. I think you might as well flock the entire tube at this point since you'll need to strip the innards to do that anyway.

The focuser leakage thing will not get to play a large part once you have flocked the tube, because less light will be reflected even if some makes it through the gaps.

As for the open back primary, i would say it depends on your conditions whether its worth it to block that. If you are imaging in heavy light pollution and there is a chance that a lot of light can enter the tube, then maybe block that with something. But this brings another issue, ventilation. The back really should be open, and preferably cooled with a mirror cell fan while in operation, because the heavy primary mirror does not really cool down on its own fast enough the ever equalize with the ambient temperature. The sharper the drop in temperature during the night the more of an issue this is.

Personally i try to keep the back of my tube open at all times for ventilation, and live with the very small gradient that can happen in the worst case scenario. But unless there is full moon or i am in a bad location this isn't really an issue since a flocked tube reflects very little of the light that gets inside the tube.
Helpful Engaging
Arun H avatar
Oskari Nikkinen:
As for the open back primary, i would say it depends on your conditions whether its worth it to block that. If you are imaging in heavy light pollution and there is a chance that a lot of light can enter the tube, then maybe block that with something.


I image from my backyard on a concrete porch. Reflected light off the concrete through the back of the scope has caused problems. My solution is to use a thick black shower cap. I cut a hole in the middle and stapled some thin black cardboard to allow adequate conduction through the middle of the cap while the sides are blocked by the thick fabric. This took care of things. Regardless, when doing LRGB, I turn all my house lights off to the extent possible  to reduce light leaks. Narrowband is much less an issue.
Helpful
Dave Bloomsness avatar
I also use a soft cover on the back of the tube sometimes. I have a 10" SW Quatro (heavily modified) and found the naked mirror back unacceptable, so I used the flocking material to cover the back of the mirror. I image from Bortle 5 skies, so the light pollution is also a factor, mostly with OSC cameras. Lately I started using an Optolong CLS CCD filter along with either a dual band or tri band filter, which really made a big difference. I put the dual or tri band filter in a filter drawer and the CLS CCD filter on the end of my coma corrector. This worked really well to eliminate all the gradients I was experiencing. With this setup, I no longer need the back cover.

Dave
Helpful
Christian Großmann avatar
It seems that light leaks are more of an issue as I expected. The hint with the narrowband vs broadband imaging might be the case, why I realize the effects more with my Newtons, because I use them mainly for LRGB these days. I think, that modifying the Newts with this flocking material may be a good idea. I also have an idea in mind how to block the light from entering through the primary mirror gaps. I'm still not convinced about the gaps in the focuser. They are really large and depending on coordinates the telescopes points to in the sky, I may get some issues with surrounding lights, although I think it is quite dark around my imaging place.

I will try to replace the cheap focuser with a more advanced one. The main issue I have with it is the weight of the camera+filter wheel. I realize that my focus graphs are not symetric and the "in focus" position shifts slightly during the night. Maybe, the new one will have a better seal and deliver more precise and consistent values.

I thank you all for your effort so far…

CS

Christian
lunohodov avatar
Christian,

I also wanted to replace the stock focuser of my Sky-Watcher. It's a Crayford and there was slippage. But then I decided to try some modifications before jumping into buying a focuser half the telescope's price.

It turned out the teflon bearing was very thin and was starting to wear out. I put a thicker one and fine-tuned the pressure on the Crayford shaft.

Now, I am very happy with the result. The focuser holds >2kg of equipment without any slippage.


Yanko
Well Written Helpful Insightful Concise
dkamen avatar
Well yesterday I flocked my Newt using black velour from a hardware store (same as the one from TS except only 9 euros for 100x54cm). 

Flocking itself took about 1 hour and I also cleaned the mirrors given the opportunity. Then another hour to put the mirrors back. It was the primary that gave me all the trouble, because there it is held by bolts which you can only access from the ~1cm gap between mirror and tube wall.  

The secondary more than made up for it because it took me 4 HOURS to align. This is not something I want to have to do ever again.  I  guess I am just terrible  at aligning secondaries.  

Anyway, afterwards it was cloudy and tonight will be cloudy again. But using my phone's  torchlightlight I was able to confirm impact of stray lights on front opening, focuser gap and back opening  is reduced, if not completely eliminated! I actually have to place the phone inside the tube to get a perceivable eflection. And when I look from the focuser I can see only the image of the primary floating in absolute dark void. 

So it  appears that it was completely worth it! And for only 9 euros (and a whole Saturday).
Helpful Engaging Supportive
Christian Großmann avatar
I already ordered some flocking material and I will do the same. My mirrors needs to be adjusted anyway, so I don't mind the time to spend on the project. I hope I will finish everything until the sky clears up again. The last few days were really cloudy with no improvement to be suspected.
Oskari Nikkinen avatar
Well yesterday I flocked my Newt using black velour from a hardware store (same as the one from TS except only 9 euros for 100x54cm). 

Flocking itself took about 1 hour and I also cleaned the mirrors given the opportunity. Then another hour to put the mirrors back. It was the primary that gave me all the trouble, because there it is held by bolts which you can only access from the ~1cm gap between mirror and tube wall.  

The secondary more than made up for it because it took me 4 HOURS to align. This is not something I want to have to do ever again.  I  guess I am just terrible  at aligning secondaries.  

Anyway, afterwards it was cloudy and tonight will be cloudy again. But using my phone's  torchlightlight I was able to confirm impact of stray lights on front opening, focuser gap and back opening  is reduced, if not completely eliminated! I actually have to place the phone inside the tube to get a perceivable eflection. And when I look from the focuser I can see only the image of the primary floating in absolute dark void. 

So it  appears that it was completely worth it! And for only 9 euros (and a whole Saturday).


One of these makes adjusting the secondary mirror a lot easier: https://www.teleskop-express.de/shop/product_info.php/info/p5506_TS-Optics-Concenter-2--Collimation-Eyepiece-for-Newtonian-Telescopes.html

Adjusting the secondary so that it sits directly under the focuser can be a wild goose chase if you try to eyeball it. With that tool you have clear concentric rings that show you exactly by how much your secondary is off-center. For normal collimation i still use a laser but just for centering the secondary this thing is really convenient, well worth the small investment in my opinion!

Making diffraction spikes even again if you put the spider back imperfectly is more of a chore though. I took pictures of mine from the front and then drew straight lines in microsoft paint to see if they are perfectly aligned or not. Couple of adjustments later and its sorted too.
Helpful Engaging
dkamen avatar
This is what I used. Took me three hours of small adjustments to get the secondary's circle (as appearing with the primary covered by paper) perfectly circular and concentric. Then I looked through an eyepiece and the primary had the shape of a rugby ball!

I honestly don't know what I did wrong.

So I did it again the traditional way, using a cheshire (for its small hole) and making sure all three mirror clips can be seen and that the image is as circular as possible.

I am not 100% sure about the spider, the vanes look equidistant but I used my daughter's ruler which isn't exactly super precise smile
Helpful Engaging
Christian Großmann avatar
Hi everybody,

today I found the time to disassemble my Newton. As mentioned, I already bought the velour foil. I was a bit sceptical, because in the artificial room light, a bit of glitter can be seen. But as I glued it to the Newton tube, it was dark as hell in there. I tried to use a flashlight to see what I was doing, but it was really hard to see something. So I am really optimistic that the work will improve my images. But as ever, it's cloudy for days outside.

I disassembled my focuser as well. The hint with the stuck bearing was really helpful. I could find, that one of the bearings got stuck on the focuser housing, because hole for the screw that holds it was drilled slightly off. The only way to fix this, was to use a dremel and sand of some of the housing material. But it worked and although it might not be the best solution for the correct alignment of the focuser tube, it works much better now. So there seems to be no need to invest several hundred euros for a better focuser (at least now). I may be able to save the money to buy another scope one day.

So thank you for your help. I am quite confident, that everything works well under real life conditions anyway.

Clear Skies

Christian
Helpful Engaging Supportive
Arun H avatar
Christian Großmann:
But as I glued it to the Newton tube, it was dark as hell in there. I tried to use a flashlight to see what I was doing, but it was really hard to see something. So I am really optimistic that the work will improve my images. But as ever, it's cloudy for days outside.


So it is a mystery to me why even the TS Optics higher end ONTCs are not supplied like this from the supplier. Mine just has flocking opposite the focuser tube (and came in with a crappy adhesive that I had to replace with a different one. Refractors, at least the good ones, come with very good flocking.
Christian Großmann avatar
Arun H:
Christian Großmann:
But as I glued it to the Newton tube, it was dark as hell in there. I tried to use a flashlight to see what I was doing, but it was really hard to see something. So I am really optimistic that the work will improve my images. But as ever, it's cloudy for days outside.


So it is a mystery to me why even the TS Optics higher end ONTCs are not supplied like this from the supplier. Mine just has flocking opposite the focuser tube (and came in with a crappy adhesive that I had to replace with a different one. Refractors, at least the good ones, come with very good flocking.

To be fair, I have to clarify that I don't own a ONTC Newton. I should have bought one, but I only own the two ones from the Photon series. They were my first ever telescopes and so they're the oldest ones I have. So it's not TSs fault. (I understand the lack of flocking material in the cheapest series. The focuser problem is another story).

The last 2 scopes I bought are their refractors. They are really nice and I'm very happy with them. But lately, I fell in love with the Newtons again, because of the aperture and the resulting shorter exposure times. Even the star spikes are a bit pleasing in some of the images to me (yes, I'm guilty of it).
Dan_I avatar
Looking through the focuser of an imaging newtonian should be like looking at a black hole. Anything bright that you see will have an impact on contrast.


Efficient counter-measures include:
  • flocking inside the OTA, especially opposite to the focuser
  • flocking the secondary holder on the focuser side
  • painting mate black (or flocking) the edge of the secondary
  • using a long flocked dew shield
  • filling in any gaps around the focuser (as in your case)
  • closing the bottom of the OTA with a shower-cap style black cap


In some cases, stray light reaching the entry lens of the coma corrector is problematic. In this case, screw  a short M48 extension in front lined with flocking material.
Helpful Engaging